Use it with caution although it’s a powerful feature!
In the previous post, we talked about how to add conditional columns in Power Query in which we identified the store type of a store by the prefix of the store number. Then we tried to define the store grade by its sales. We did that by adding conditional columns. In this blogpost, we try to do the same but with a different approach, using Column From Examples.
Before we start, let’s see a few stunning examples about adding column from examples using Power Query. In a way, Column From Examples is remarkably similar to Flash Fill. The key difference is, like all other Power Query magics, Column From Examples returns refreshable result while Flash Fill returns static result. The former is excellent for repeatable tasks; the latter is best for one-off tasks.
Let’s start with a typical example:
Dealing with First, Last name
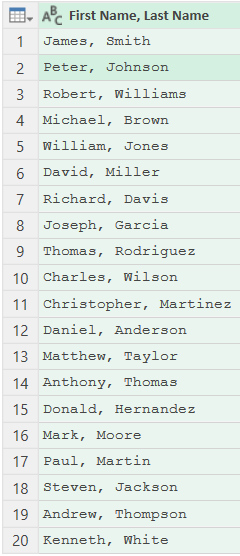
Let say we have the above dataset loaded into Power Query Editor. We want to achieve the following tasks by using Column From Examples:
- Get the First Name
- Get the Last Name
- Swap First Name Last Name and remove comma
Super typical. Let’s see how this can be done in Power Query.
You may download a sample file to follow along:
Let’s watch it in action:
If you prefer reading to watching, please continue to read.
Get the First Name
In Power Query Editor
- Go to the Add Column tab
- Select from the dropdown menu of Column From Examples
- Select From Selection

The following “Add Column From Examples” opens

- Check the column(s) you want to refer to
- Rename the new column you want to add (optional)
- Start giving an expected value (bingo! Power Query knows what you want, given such a clear pattern in the sample dataset. Text in black is what I input; text in grey is what Power Query suggests)
- Review the formula (as well as the content) suggested by Power Query
- Click OK if you agree the suggested formula (or give more examples by correcting incorrected suggestions)
Indeed, I had only input the first example “James”. As the pattern is super clear (in our demo), Power Query can detect it without any problem. Wonderful!
Get the Last Name
If we want to extract the last name, we just need to repeat the steps above. Power Query is smart enough to detect the pattern after the first example given, i.e. “Smith”.
Look at the formula suggested, it returns the text after the delimited ” ” (space). Bravo! (Compare it to the formula suggested for getting the First Name above)

Swap First Name Last Name and remove comma
First Example “Smith James” given. However, given the relatively complex pattern, Power Query needs more examples to provide a suggestion.

With the second example provided, Power Query suggests a formula that is not correct…

Let’s give more examples. By inputting “Williams Robert” in the third line, Power Query manages to determine what we want to achieve. It suggests another (more complicated) formula to return the result that we want. Amazing!
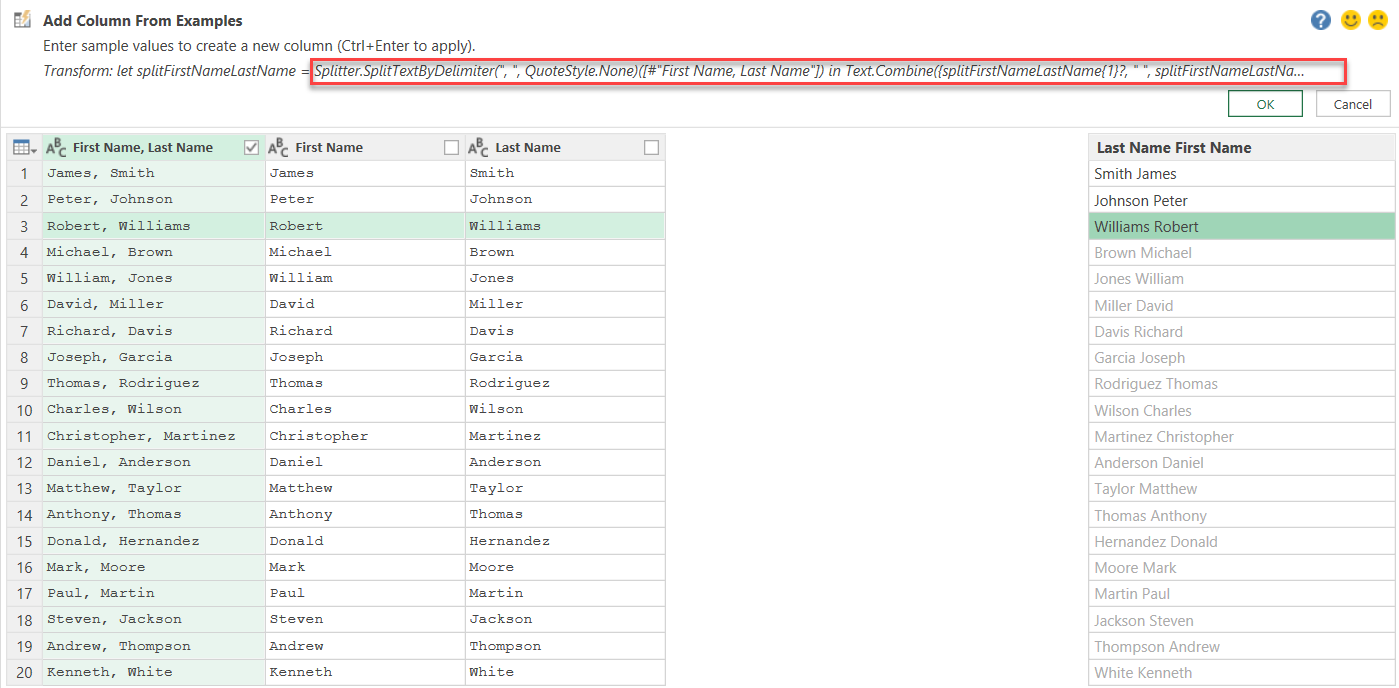
Let’s accept the suggestion and see the full formula. WOW… It’s not easy to comprehend this. But it works! 😉

In short, this formula looks for “, ” as the delimiter to split the text in the column “First Name, Last Name” and then swaps the position of the split texts and finally joins them together with ” ” as delimiter.
Right now, we have three columns added by examples. It looks promising (for the given dataset)! What if we have new data added?
For sake of demonstration, I added new records with different patterns intentionally!
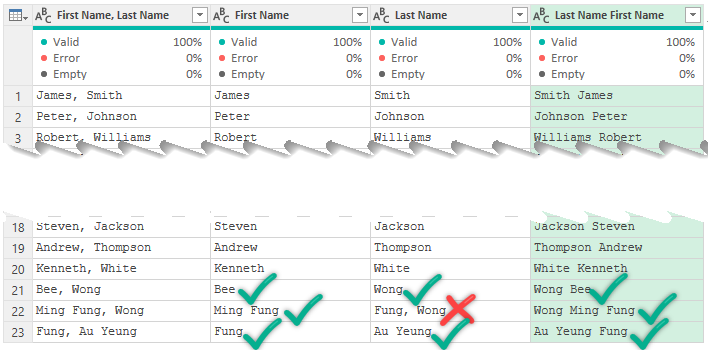
As you see from the above, the Last Name for row 22 does not return the expected result. As a user, I may say Power Query is wrong about that. However, Power Query would argue that she is doing exactly what I told her to do!
Let’s review the formula suggested by Power Query for getting the Last Name again:

- Power Query: Did you accept this suggestion?
- Me: Yes… but…
- Power Query: Yes. And I delivered!
- Me: um…… 😶
“Ming Fung, Wong” is the rule breaker. 😅
The reason for the unexpected result is the presence of the space ” ” in the first name. What Power Query did is simply get the text after the first space ” “. That’s why “Fung, Wong” is returned.
Is Power Query wrong? Well, I would not say so.
Morale of this example:
A consistent pattern is key to success! Ask yourself if future data will carry the consistent pattern.
When we deal with a big data set, using Columns by Examples is dangerous! Remember this: first one thousand rows of data are imported into Power Query Editor. Columns by Examples scan the sample dataset to provide suggestions. If there are different patterns not showing up in the sample dataset, Power Query may suggest a solution that only fits to the example dataset, but not the rest.
Must read and understand the formula suggested by Power Query (If you don’t, you put yourself at risk)
Laziness comes with a cost (most of the time) 😅
Let’s go back to the examples from previous post
In the previous blogpost, I showed you how to get the prefix from Store ID to determine its store type and hence channel. Let’s see if using Columns From Examples can achieve the same.
Just to remind, here’s the logic:

By using Column From Examples, this is what we get:
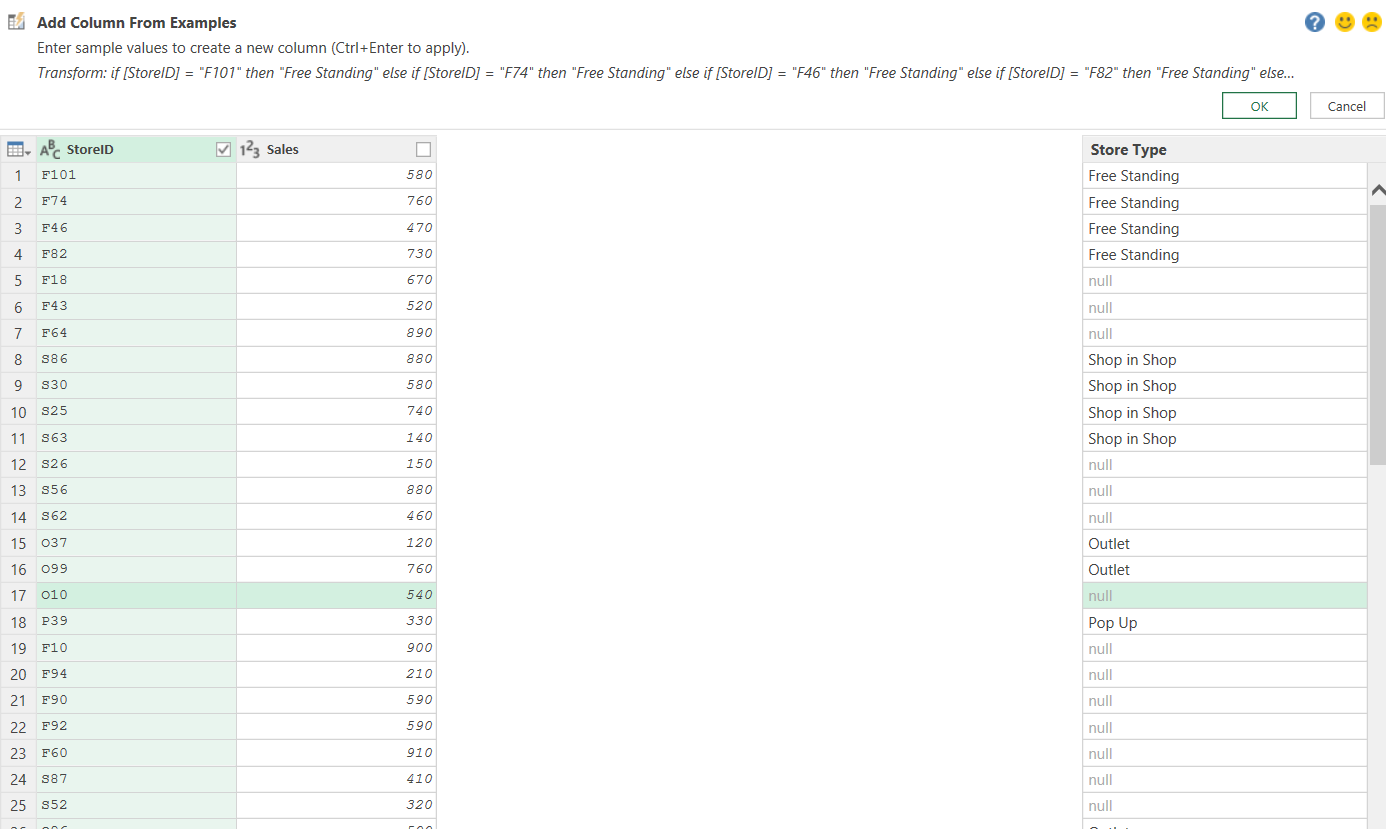
I have input 16 examples (4 for each store type) and tried even more. However, Power Query cannot see the pattern from the examples. Instead of looking at the prefix from the Store ID for a pattern, Power Query keeps looking at the Store ID as a whole and suggests the following conditional formula based on Store ID… 😵
= Table.AddColumn(#"Changed Type", "Store Type",
each if [StoreID] = "F101" then "Free Standing"
else if [StoreID] = "F74" then "Free Standing"
else if [StoreID] = "F46" then "Free Standing"
else if [StoreID] = "F82" then "Free Standing"
else if [StoreID] = "S86" then "Shop in Shop"
else if [StoreID] = "S30" then "Shop in Shop"
else if [StoreID] = "S25" then "Shop in Shop"
else if [StoreID] = "S63" then "Shop in Shop"
else if [StoreID] = "O37" then "Outlet"
else if [StoreID] = "O99" then "Outlet"
else if [StoreID] = "P39" then "Pop Up"
else if [StoreID] = "O96" then "Outlet"
else if [StoreID] = "O34" then "Outlet"
else if [StoreID] = "P89" then "Pop Up"
else if [StoreID] = "P90" then "Pop Up"
else if [StoreID] = "P34" then "Pop Up"
else null, type text)

'Come on Power Query... are you expecting me to input the store type of each store one by one?
Tip: Make your own judgment in providing examples and decide to stop at certain points. For myself, I would stop if I cannot see the result expected after 5-10 examples given.
Let’s do it again with a helper step – Get the First Character

This is such a clear pattern that Power Query recognizes with only two examples given! Wonderful!
We can then add the column Store Type by using Column From Examples based on this newly added column easily.
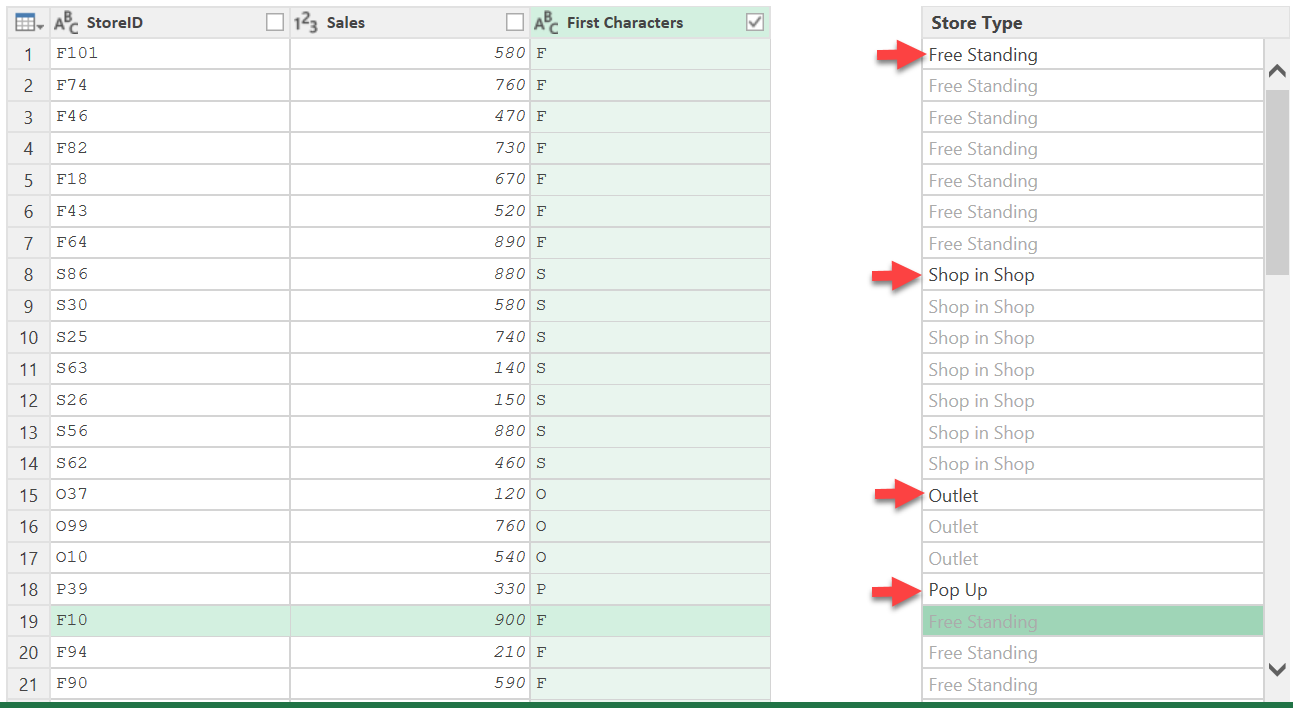
See? With only 4 examples input, one for each store type, Power Query manages to suggest the following formula:
= Table.AddColumn(#"Inserted First Characters", "Store Type",
each if [First Characters] = "F" then "Free Standing"
else if [First Characters] = "S" then "Shop in Shop"
else if [First Characters] = "O" then "Outlet"
else if [First Characters] = "P" then "Pop Up"
else null, type text)

Tip: replace "null" with "others" (no quotations) if you want to display "others" instead of null for stores not starting with the four prefixes specified
Pretty Cool! We may continue to add the column “Channel” by the Column From Examples. Pls try!
Adding column for Store Grade
Let’s try if we can achieve this with Column From Examples.
In order to do this, I’ve given examples tactically. I try my best to give examples at the boundaries. But you know, in reality, we may not find the perfect dataset to give examples.
This is what I’ve input. Look at the formula suggested after 5 examples given:

After clicking OK, I can see the following formula created for the step:
= Table.AddColumn(#"Added Conditional Column", "Store Grade",
each if [Sales] >= 740 then "A"
else if [Sales] >= 330 then "B"
else "C",
type text)

'Note: the order we input sample values may have impact on the formula suggested
This is not exactly for I need but awfully close. What I need to do is to revise the number 740 and 330 according to my requirement. This is awesome!
Morale of this example:
Don't be afraid of the M formula! Many problems can be solved by a simple fix.
Conclusion
Example From Columns is the Power Query version of Flash Fill. There are so many possibilities with this feature in Power Query. It is powerful, easy to use, and promising! Strongly recommend you explore it by yourself.
Having said that, this must be used with caution. We should always review the formula suggested and make judgements. Afterall, we (human not machine) are responsible for the output from Power Query (or even Excel formula).
How do you use Example From Columns in Power Query. Please share with us your use cases! 😉


