It is a common task to compare two lists in Excel. This can be achieved with MATCH function. But what if you want to compare a list of filenames stored in your spreadsheet, with the files you’ve got in a folder?

Will you do it manually, by eyeballing? @_@
The first challenge is to get the list of files you have in the folder. The second challenge is that fact that you will receive files and put them into the folder from time to time. In other words, the folder content is changing. You absolutely want a dynamic solution that helps you to monitor the status at ease, so that you know which files are missing.
Here comes Power Query to rescue.
Note: All the screenshots are coming from Excel 365. If you are using Excel 2010/2013, Power Query has its own tab on the ribbon. Moreover, you need to download and install Power Query for Excel as add-ins. You may download Power Query for Excel in the following link:
https://www.microsoft.com/en-hk/download/details.aspx?id=39379
If you are using Excel 2016 or later, Power Query is already built in and resides in Data tab, but renamed as Get and Transform.
The following is the step by step approach to solve the problem.
A. Convert the list of files in an Excel Table
Select a cell of the data range, then press Ctrl+T to create an Excel Table
- Check the data range is correct
- Check “My table has headers”
- OK

B. Load the Table to Power Query
- Go to Data Tab
- Click “From Table/Range“

Now you should have the Power Query Editor opened.
Note: The Power Query Editor is where all the magic happens. Nevertheless, the intention of this post is not to explain in details all the magical stuff in Power Query. Hence please follow the steps and focus on the solution to the problem stated.
- Rename the query. As a good practice, always rename your query to something meaningful. In our case, it’s renamed as “FilesRequired“. That is the files we are expecting in the designated folder.

C. Load the list of files in the designated folder to Power Query
- On the Home tab of Power Query Editor
- Click the pull-down menu of New Source
- Select Folder

Another dialog box opened. From there,
- Either browse to the folder path, or input directly
- OK

In just a second, you should see the following.
- Simply click Transform Data

Note: If you are using Power Query for Excel 2010/2013, the button “Transform Data” is labelled as “Edit”.
Now you should have the second query loaded to Power Query Editor. This query showcases attributes of all files in the designated folder.
- Rename the query to “FilesReceived“

A quick recap here:
By now, you should have two queries loaded to Power Query Editor. And the queries are
- FilesRequired – From the Table on the spreadsheet, i.e. the list of files you are expecting
- FilesReceived – From the Folder, i.e. the files you’ve got in the designated folder
D. Merge the two queries with Left Anti Join
Now we are going to compare the Query FilesRequired to FilesReceived, in order to identify the files that are available in FilesRequired, but not yet appeared in FilesReceived. This can be achieved by merging the two queries.
- On the Home tab of Power Query Editor
- Open the pull down menu of Merge Queries
- Select Merge Queries as New

In the subsequent Merge dialog box:
- Select FilesRequired
- Select FilesReceived
- Click the header “Files Required” under FilesRequired
- Click the header “Name” under FilesReceived
- Select Left Anti (rows only in first)

IMPORTANT: Make sure you have made the correct selections in order, and also you have selected the two matching columns from the two queries.
In plain English, the above steps mean:
By using the columns “File Required” (from the 1st query – FileRequired) and “Name” (from the 2nd query – FilesReceived), merge the two queries by using the Join Kind Left Anti, i.e. keep rows only appeared in the first query, but not the second query.
In other words, show me the files I have not yet received in the designated folder.
Make sense?
E. Load the result
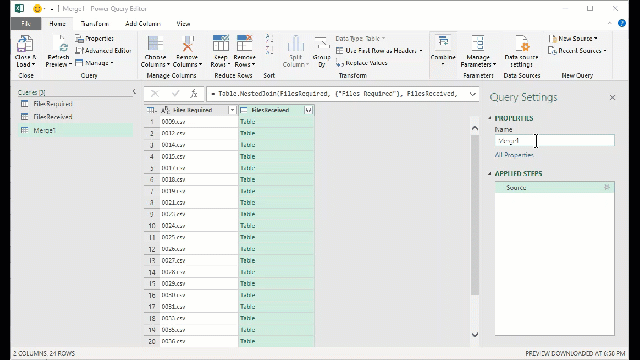
You should have a new query called Merge1 as a result. Let’s rename it to “FilesPending“.
Then remove the second column the resulting query, and rename the first column as Files Pending. The final step is Close and Load.
Let’s watch the following screencast:
Here we go! Simply awesome! 🙂

Note: All three queries are loaded to three different worksheets. If you don’t need the first and second queries, i.e. FileRequired and FilesRecevied, loaded to worksheets, you can delete the worksheets. By doing so, you will not delete the query, which is always behind the scene (until you delete it from Power Query Editor). You will see the change in the Queries and Connection Pane from “# rows loaded” to “Connection only”.

F. Get updated results when new files come, with two clicks
You know what, the best of Power Query is yet to demonstrate. When new files come, we don’t have to repeat the steps above. Simple REFRESH the resulting table and get updates!
You may watch it in action on my YouTube channel. Please turn on CC for English subtitles.
EndNote:
I hope this video could arise your interest in Power Query. What I demonstrated in this video was just the tip of the iceberg. Power Query is indeed super powerful and a must-know if you are serious in data professional. I hope you will get to know it more!


