What to do with Linked Picture to create something interesting in #Excel?
How about an Interactive CV to show off your Excel skills!?
First, why?
Once upon a time when I updated my CV, I was thinking…
Everyone states something like “Proficiency in Excel” in CV… ummm… probably someone would put the word “Highly” in front of “proficiency” with an intention of standing out from competition. Someone may even write a whole paragraph to explain what they do with Excel in plain texts; needless to say there would be lots of Excel jargon like VLOOKUP, PIVOT TABLE… etc.
While I was thinking how to describe my Excel skills in words, an idea flashed in my mind: “Why not showing my Excel skill in CV directly?”
That’s why I came up with this Interactive CV. By the way, it is so much FUN to do one, isn’t it?
The first step – Thinking Process
No special Excel skills but paper and pencil.
Although it may sound silly to few people, it is indeed a good habit to draft your idea on a paper first. You may not know what you want to create at the beginning. When you have your idea stretched on paper (normally it takes many revisions before you are happy with your draft), you will probably clear (if not clog up) your mind clear. 🙂
Then draw what’s the end result you would like to see.
A more well-known fancy term for this process, which I believe is, Reverse engineering.
Don’t underestimate the power of this process. Most of the time, I start from the end when I develop dashboard……
Okok…… enough words… I heard that. Let’s dive into HOW?
We need the following skills:
- Dynamic Linked Picture (i.e. Lookup an image)
- Pivot Table
- Slicer
- Custom List
- Formatting tricks
You may download a Sample File to follow along.
First, make sure you know how to lookup an image. If you do not, please read my previous post first.
1. Prepare the canvas – replicating the drawing on a spreadsheet
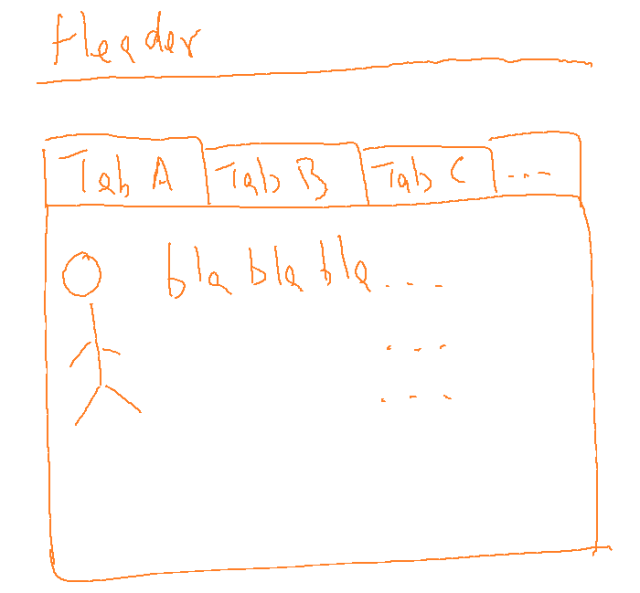
The header is easy. We just need dirent input.
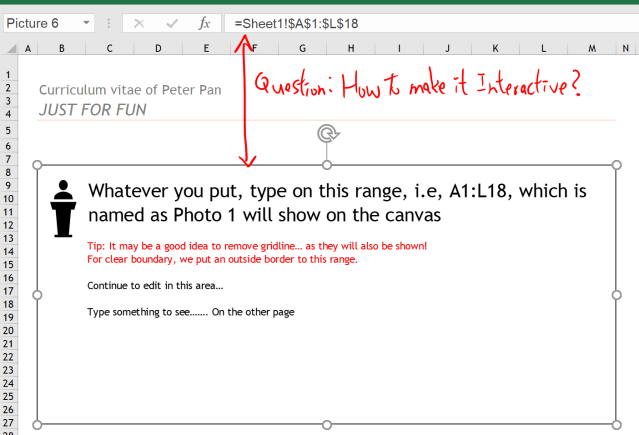
Then define the area (let’s say the Canvas, this will be the term I use in this article to refer to the area) to show the content. In our example, it’s a range of 18 Rows x 12 Columns. Remind you to leave some space for adding Tabs on top later.
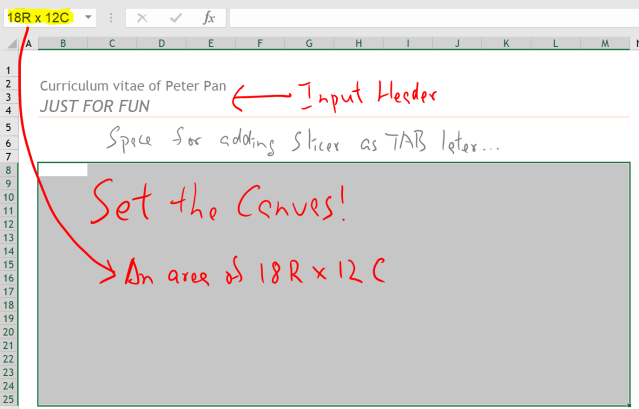
Note: We are not going to input content directly on the canvas. Instead we will use Linked Picture that is response to an input controlled by Slicer. Btw, the size of Canvas is totally up to you.
2. Content preparation
Go to a new worksheet. Select a range of 18 Rows x 12 Columns; and then name it as Photo1 by inputting “Photo1” (double quotes are not required) in the name box.
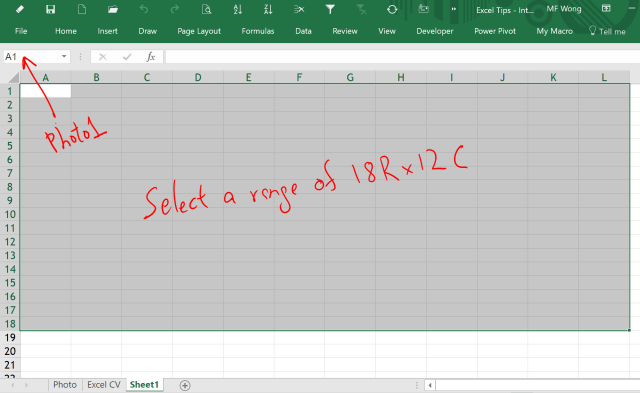
Tip: For best result, the “size” (height and width) of the range should be the same as the size of the Canvas.
You will see why I name the range as Photo1 later.
3. Create a Linked Picture
Select Photo1 from the name box pulldown –> Range Photo1 is selected –> Copy –> Go back to the Canvas (i.e. Sheet Excel CV) –> Paste as Linked Picture
The following screencast shows the steps:
We have just created the first page. Feel free to change the contents on the range Photo1 and go back to the Canvas to see the effect: 
4. Set up ranges for Photo2 to Photo4
On Sheet1, select another range of 18 Rows x 12 Columns and name it as Photo2.

Repeat the same for Photo3 and Photo4. (Note: We don’t need to create any more Linked Picture here)
When it is done, you may see the four names Photo1 to Photo4 in the name box. Select them one by one to ensure you have the ranges set up correctly.
Tip: It’s a good idea to remove grindline and add outside border to each range.
Now the question is: How to make the Linked Picture created in step 1 interactive?
The technique was discussed in the previous post: How to lookup an image in #Excel. However the situation here is a bit different, we want user to input by clicking on a Tab, which is “pretended” by Slicer.
Slicer? Yes. Slicer, a wonderful feature added to Pivot Table since Excel 2010 (to Table since Excel 2013).
Chandoo has an awesome post introducing Slicer.
5. Setting up the (helper) Pivot Table
Well… I plan to called the four tabs as “Profile”, “Education”, “Skills” and “Contact”. As such, I created the table shown below.
| Tab Name | Position |
| Profile | 1 |
| Education | 2 |
| Skills | 3 |
| Contact | 4 |
A Pivot Table is inserted based on it. See below:
By now, you should get a simple Pivot Table like this: 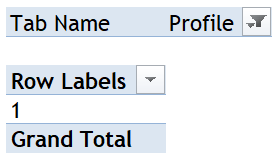
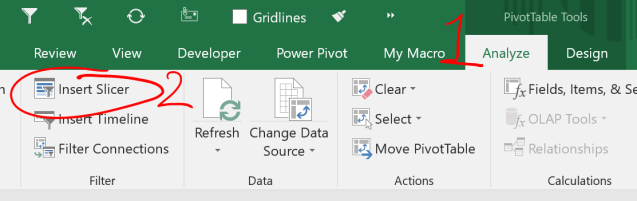
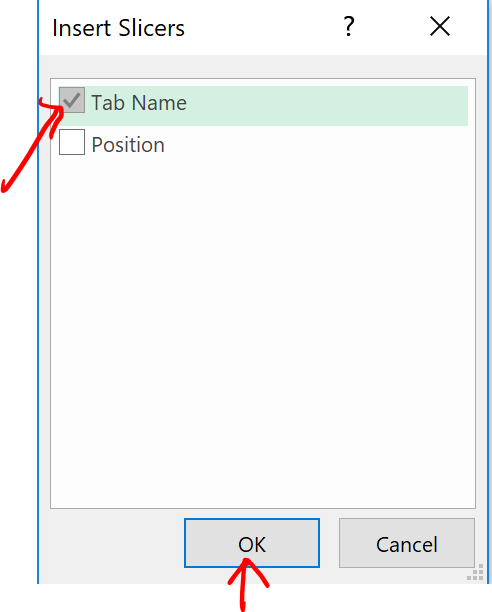
6. Insert a Slicer
Edit the Slicer a little bit…
Note: To make the buttons sorted in the way we want, we need to set up a Custom List first.
Now we should have a Pivot Table with Slicer like this:

7. Build a bridge to connect the Slicer and the Named Ranges (i.e. Photo1 to Photo4)
In R13, input the following formula:
="Photo"&P13

Now, you should see the reason for naming the ranges as Photo1, Photo2, etc…

8) Set up the dynamic Named Range
Formulas Tab –> Define Name
In the New Name dialogue box, input Pic in “Name”; the following formula in”Refers to:”
=INDIRECT($R$13)
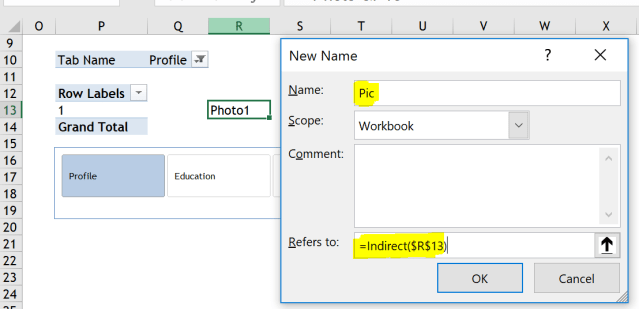
Note: We cannot input R13 directly. The function INDIRECT is used to tell Excel that the textsting refers to a range/reference.
9) Make the Linked Picture interactive
Select the Linked Picture –> Input =Pic in formula bar
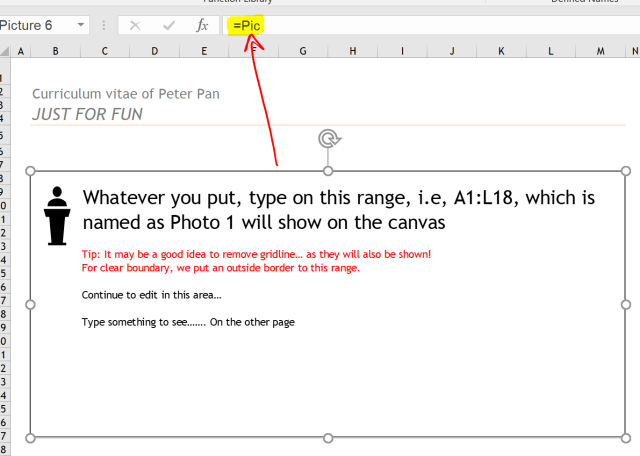
We are almost there…
10) Makeup the slicer
Obviously the final step is to move the Slicer on top of the Linked Picture, followed by some Formatting tricks. For this, I would like to divert you to the post – Getting Fancy with your Excel Slicers by Mike Alexander, where I learn this wonderful trick to format slicer. The idea is simply brilliant.
Endnotes:
When you have created your own Interactive Excel CV, are you going to send it for job application? If you do, consider:
- Most job application (web) platforms do not accept .xls or .xlsx files.
- In read business would, even though job application is sent in electronic format, there is high chance that CV of potential candidates will be PRINTED before they circulate to the line managers. Do you think your Excel CV will be printed Tab by Tab, without missing??
- Are you sure if your targeted readers have Excel 2010 or later? I know many companies are still using Excel 2007 or even Excel 2003… 😦
- Are you sure the persons who open the Excel file has the knowledge or curiosity to click on the Tab? Believe it or not, many people are not aware of the existence of Slicer even though they may have used Excel every day. And many people would never image Excel has this kind of interactivity.
- Even all of the above have been handled professional. Your CV got printed and circular to the line managers without any missing page…. Think about how your wonderful Excel works will look like on pages of paper. Where is the interactively?
Afterall, if a CV fails to take you to an interview, it is not an effective CV. 😛


How can we move tabs in slider? I mean how to replace for example “education” with “skills”? I just found ascending/descending, bot not a drag and drop thing or a custom way….
How may I do this?
LikeLike
Hi Ali, You may create your custom list, then sort the Slicer by custom list.
LikeLike
thank you so much! It helped me a lot!
LikeLike
You are welcome. Glad it helped!
LikeLike
Can’t wait to try this myself!
LikeLike