VBA to make selected sheets “Very Hidden”; all sheets visible

Weeks ago, I showed the way to unhide a very hidden sheet in #Excel via Visual Basic editor (VBE). You may refer to that post HERE. Technically we could follow the same steps to make a worksheet very hidden. The problem is… we need to do it sheet by sheet. Think about if you want to make 10 selected worksheet very hidden, it takes quite a while (well… a minute or two is quite a while nowadays, isn’t it?). So it’s better to have a “fast” way to do it in one click instead of repeating steps in minute(s). To achieve this, we need a few lines of VBA codes.
If you have been following my blog, you should know that I seldom write on VBA as I am not really good at it. Having said that, I do use macros / VBA to enhance efficiency in daily work.
So in this post, I am trying to demonstrate how we can make use of the codes generated by recording a Macro and then modify it to achieve some simple codes that we need. Nevertheless, you are expected to know the very basic of macro and VBA.
Let’s see the codes first. The codes for making selected sheets very hidden are short, as shown below:
Sub VeryHiddenSelectedSheets()
Dim ws As Worksheet
For Each ws In ActiveWindow.SelectedSheets
ws.Visible = xlSheetVeryHidden
Next ws
End Sub
To start with
Make sure you have the “Developer” tab on the Ribbon. If not, please follow the step below:
File –> Options
- Customized Ribbon
- Check “Developer”
- Click OK

Let’s record a Macro to hide a worksheet in normal way.
Record a Macro
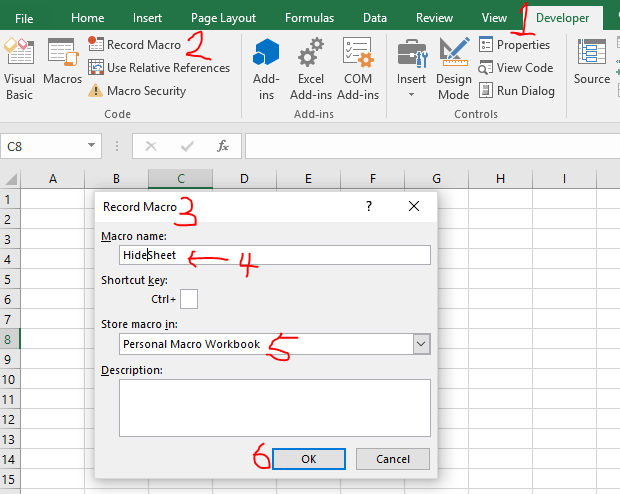
- Go to Developer Tab
- Record Macro
- The Record Macro dialogue box opens
- Assign a Macro Name (this step is not necessary but a good practice)
- Store macro in “Personal Macro Workbook” (as we want to use it in the future)
- Click OK
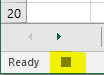
Now the Marco Recorder is running. You may notice the “Record Macro” button is now toggled to “Stop Recording”.

Same icon displayed on status bar next to “Ready”.
Perform the actions we want to record
Right-click Sheet1 –> Hide

(note: avoid unnecessary steps including scroll up or down as all steps will be recorded once you started Record Macro. In case you have recorded extra lines of codes, remove them afterward)
Stop Recording
By clicking either the “Stop Recording” on ribbon, or the “Stop” icon on status bar.
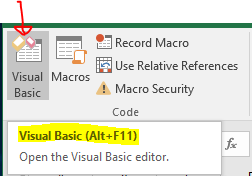
Open the Visual Basic editor (VBE) to view the codes recorded
Click the “Visual Basic” under “Developer” Tab; (Shortcut: Alt+F11)
- Look into VBAProject
- Expand “Modules” under VBAProject (PERSONAL.XLSB)
- Double click “Module1” to view the code

The following are the codes recorded by Macro.
Sub HideSheet() 'All macro starts with Sub, and the name assigned to it
 Sheets("Sheet1").Select 'First action to select the sheet
 ActiveWindow.SelectedSheets.Visible = False 'Second action to hide it
End Sub 'All macro ends like this
Although it is a programming language, it is not difficult to understand. All codes run line by line. The above codes do two things:
- Select the sheet named “Sheet1”
- The selected sheets in the active window is set to invisible (.visible = False)
The codes make Sheet1 invisible, Sheet1 only. However, our goal is to make selected sheets invisible. So we need to modify the code to loop through all selected sheets. I know that For Each loop can do that. What I need is the hint to write the For Each statements correctly.
Luckily, the hint is right there on the second line: ActiveWindow.SelectedSheets.Visible = False.
Modifying the codes
- Define ws as Worksheet (note the intelligent sense while I type Dim ws as…)
- Copy the “ActiveWindow.SelectedSheets“
- Remove the line: “Sheets(“Sheet1”).Select“
- Type the For statement: For each ws in ActiveWindow.SelectedSheets
- Replace “ActiveWindow.SelectedSheets” with “ws“
- Type the Next statement: Next ws
See the steps in action below:
Here’s the modified code:
Sub HideSheet()
Dim ws As Worksheet
For Each ws In ActiveWindow.SelectedSheets
 ws.Visible = False
Next ws
End Sub
Practically the codes tell Excel to loop all the sheets selected, and make the sheet invisible one by one, until it’s gone through all the sheets selected.
Not too hard to understand, right?
Try the codes
- Select multiple sheets in the active workbook
- Go back to the VBE window, click into any line of the code you want to run
- Click the “Play” button to run the codes
See the steps in action below:
Cool! Selected sheets were hidden, although not very hidden.
Final Modification
We learned from the post that there are three options for a worksheet visibility.

Naturally, we know where to further edit the code:
Tip: We may use either 2, xlSheetVeryHidden, or xlVeryHidden
Make sense?
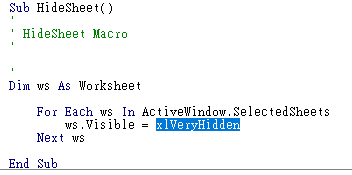
Here’s the final code:
Sub VeryHiddenSelectedSheets()
Dim ws As Worksheet
For Each ws In ActiveWindow.SelectedSheets
ws.Visible = xlVeryHidden
Next ws
End Sub
Note: I have also changed the name for this subroutine.
Since we have made multiple sheets very hidden, it will be another time-consuming process to bring them back one by one.
Why not further modifying the codes to Unhide all sheets?
If you have been following through, and has basic knowledge about VBA, this would be super easy.
Here’s the modified code for making all worksheets visible:
Sub UnhideAllSheets()
Dim ws As Worksheet
For Each ws In Worksheets
 ws.Visible = True
Next ws
End Sub
What were modified?
- Name of the subroutine, of course
- where to loop
- visibility
Not to difficult, right?
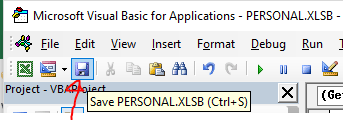
IMPORTANT: Don’t get too excited and forget to save your codes… 😛
Let’s try the code
We don’t have to toggle between the VBE and the workbook to run the codes. We could do it in the workbook environment:
- Go to Developer tab
- Click “Macros”
- Select the Macro you want to run
- Run

Well… it involves four clicks. Did I say in the beginning that we can do it in one click???
Yes, I did. That’s why we need to go further in order to save more time in the future!
Assign macro onto QAT
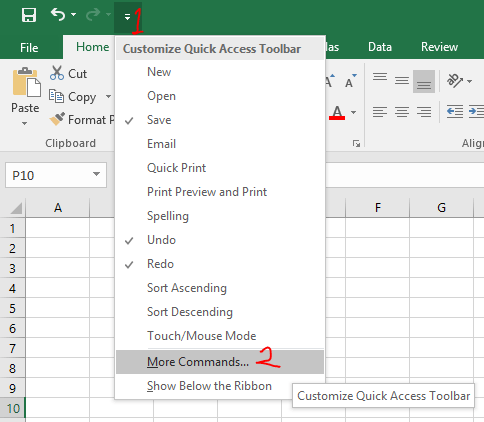
- Click the drop down icon on the rightmost on QAT
- Select More Commands…
In the Excel Options
- Click the drop down for “Choose commands from:”
- Select Macros
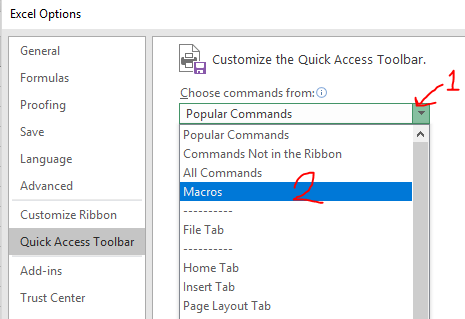
- Select the Macro we want to add to QAT
- Click Add>>

You should see the added Macros move to the right column:

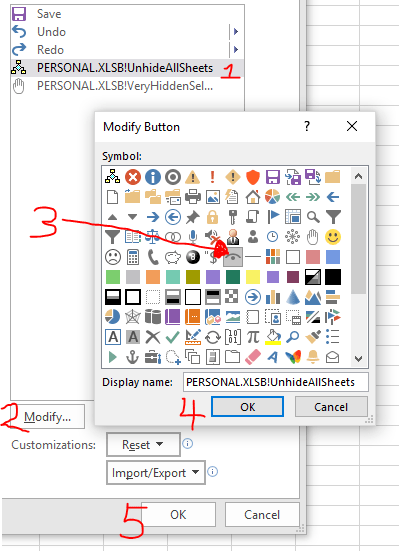
You may change the icon associated with it.
- Select the Macro on the right column
- Click Modify…
- Select an icon you like
- Click OK
- Click OK
(Indeed, you may not find an icon that perfectly describes the action. Just try the best.)
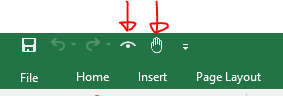
These are the one-click icon for making all sheets visible and selected sheets very hidden.
Let’s see it in action:
I hope you like it. 🙂
No sample file comes along with this post as .xlsm file is not supported here. 😦
By the way, it makes no sense for these macros to be stored in a workbook. They should be stored in your Personal Macro so that you may use them easily any time you need them.
End Notes:
When we know some basic principles about Macro/VBA, it is easy to turn some time-consuming steps into a one-click action. Especially in the era of internet, we may find a lot of useful VBA sample codes to fix different problems in Excel. We just need know where to put the codes, and how to modify the codes to fit our special needs.
From my experiences, it is not an easy journey. I got errors and errors, again and again. Failure was the norm in the beginning. After many trials and errors, I am getting better in modifying the codes I need. A general tip is to start with baby step: Break tasks into small steps. However, if you are serious in learning VBA, my suggestion is read a book or take a course and learn from scratch. But most importantly,
Keep practicing.


