In regular Excel, Text to Columns is the non-formula approach to split contents from a column into multiple columns. It is a very powerful feature in Excel which many users are not yet aware of it.

If you want to learn more about Text to Columns, click here.
In Power Query, the Split Column is even more powerful, yet handy!

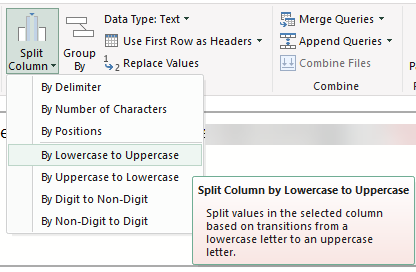
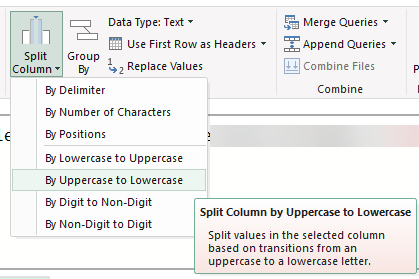
As you can see the from screenshot above, there are seven ways to split a column (if you are not using an old version of Excel).
- By Delimiter
- By Number of Characters
- By Positions
- By Lowercase to Uppercase
- By Uppercase to Lowercase
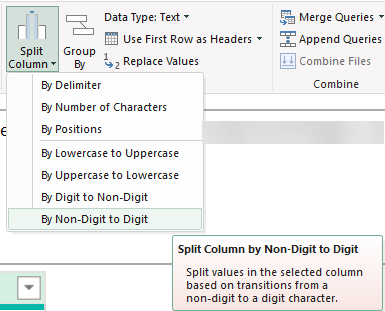
- By Digit to Non-Digit
- By Non-Digit to Digit
Note: Depends on the version of your Excel, you may not have options 4 to 7.
In this post, I will walk you through the 7 options to spilt a column. If you prefer watching video instead of reading, please go to the end of the post.
You may download a sample file to follow along.
New to Power Query, please read this to start with.
By Delimiter
The first option we have is “By Delimiter”. As the name suggests, we can splits a text column into multiple columns by delimiter. As you see from the screenshot below, we can select common delimiters from the pulldown menu, or select –Custom– and input a custom delimiter which could be a symbol, or letter, number, even a text string.

Let’s start with simple example:
- _ (underscore) as delimiter
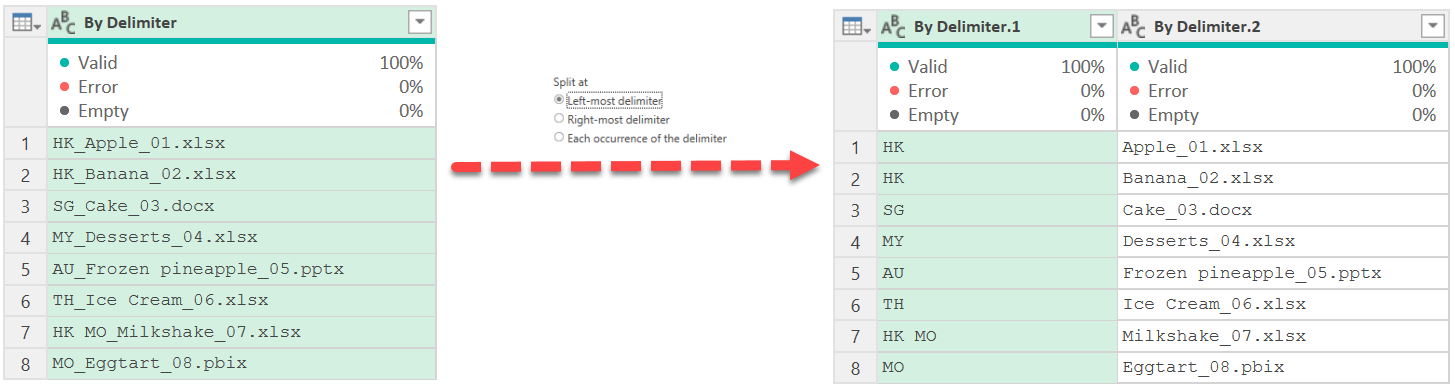
- Split at the Left-most delimiter
Here’s the result! Very straightforward.
When we select to split at “Right-most delimiter”:

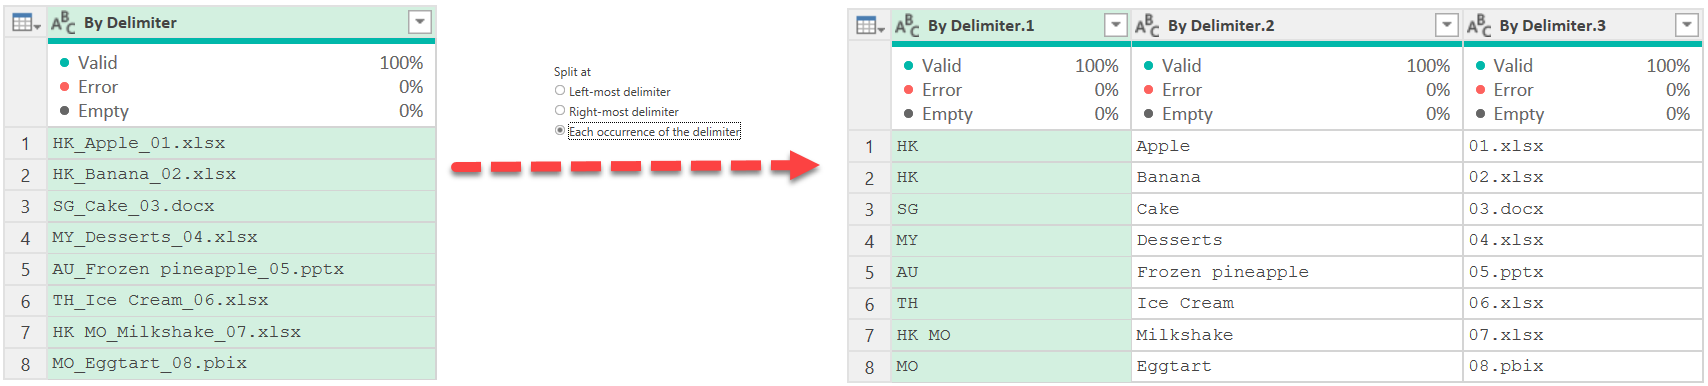
When we select split at “Each occurrence of the delimiter”:
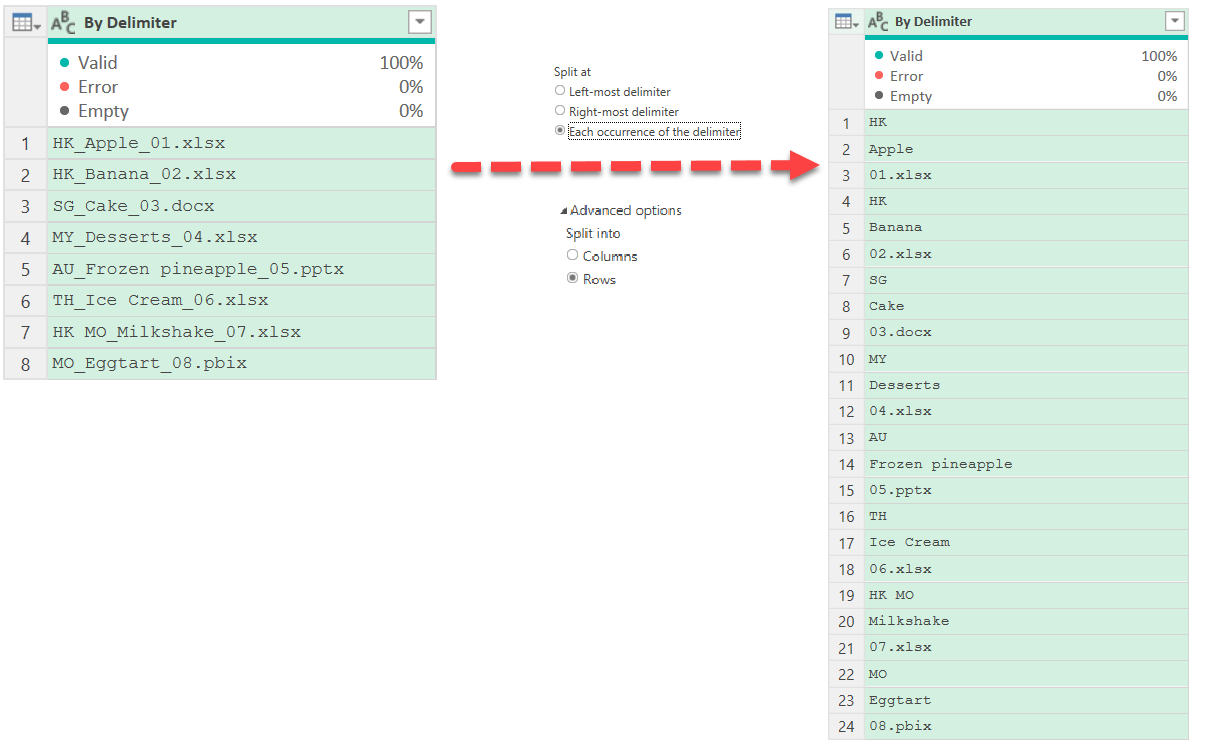
Under the Advanced options, we can split into rows instead of (the default) columns.
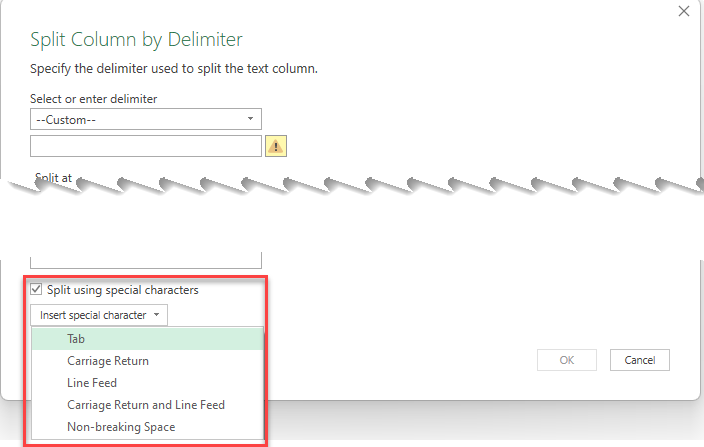
Last but not least, Power Query offers a list of “special characters” when we select “–Custom–” as delimiter. It is super handy as it’s not easy for a regular user to know the code for Tab, Line Feed, etc. 👍
Here’s a blogpost showing how to split a column with line feed as delimiter into rows.
Now you know that there is an option to split into rows under “Advanced options”. The rest of the examples will show you the result using the default split into columns option.
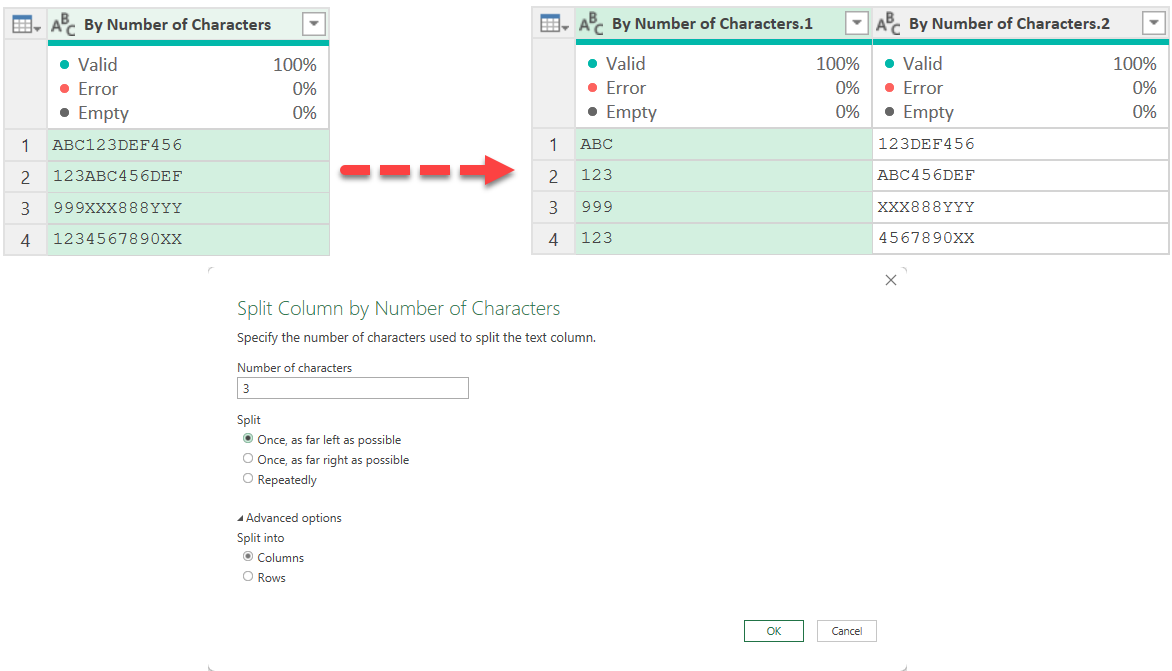
By Number of Characters
This is to split text with fixed length of characters. There are three (indeed four) parameters to be input.
- Number of characters to split
- How we want to split
- Split into rows or columns (default is columns)
- You will see it only for splitting repeatedly

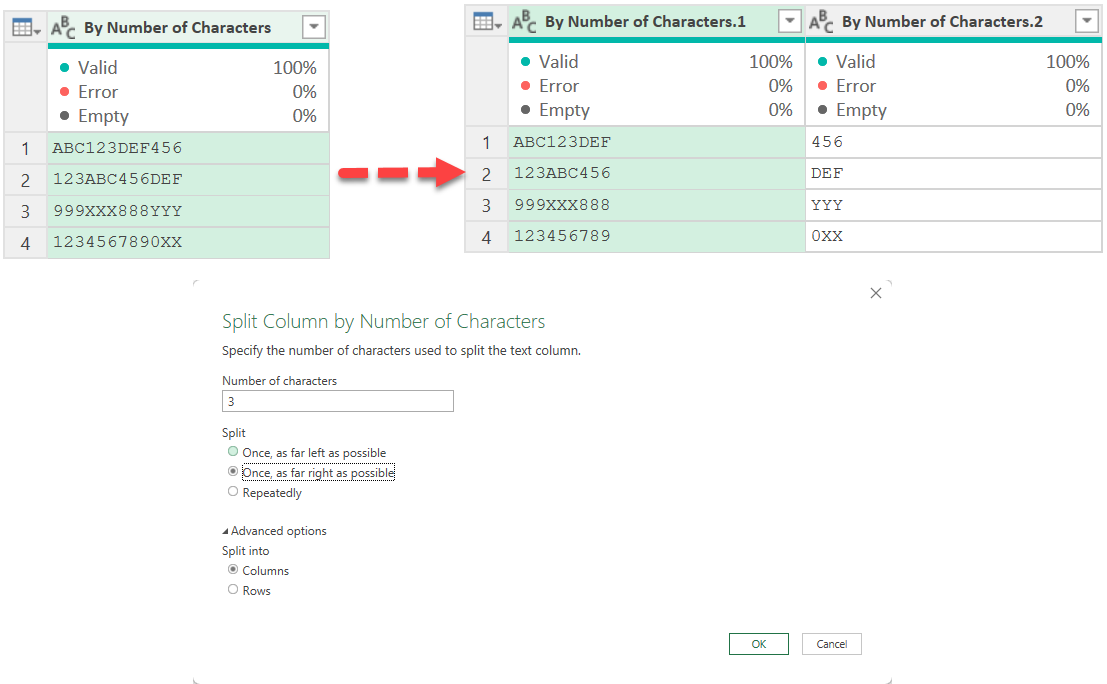
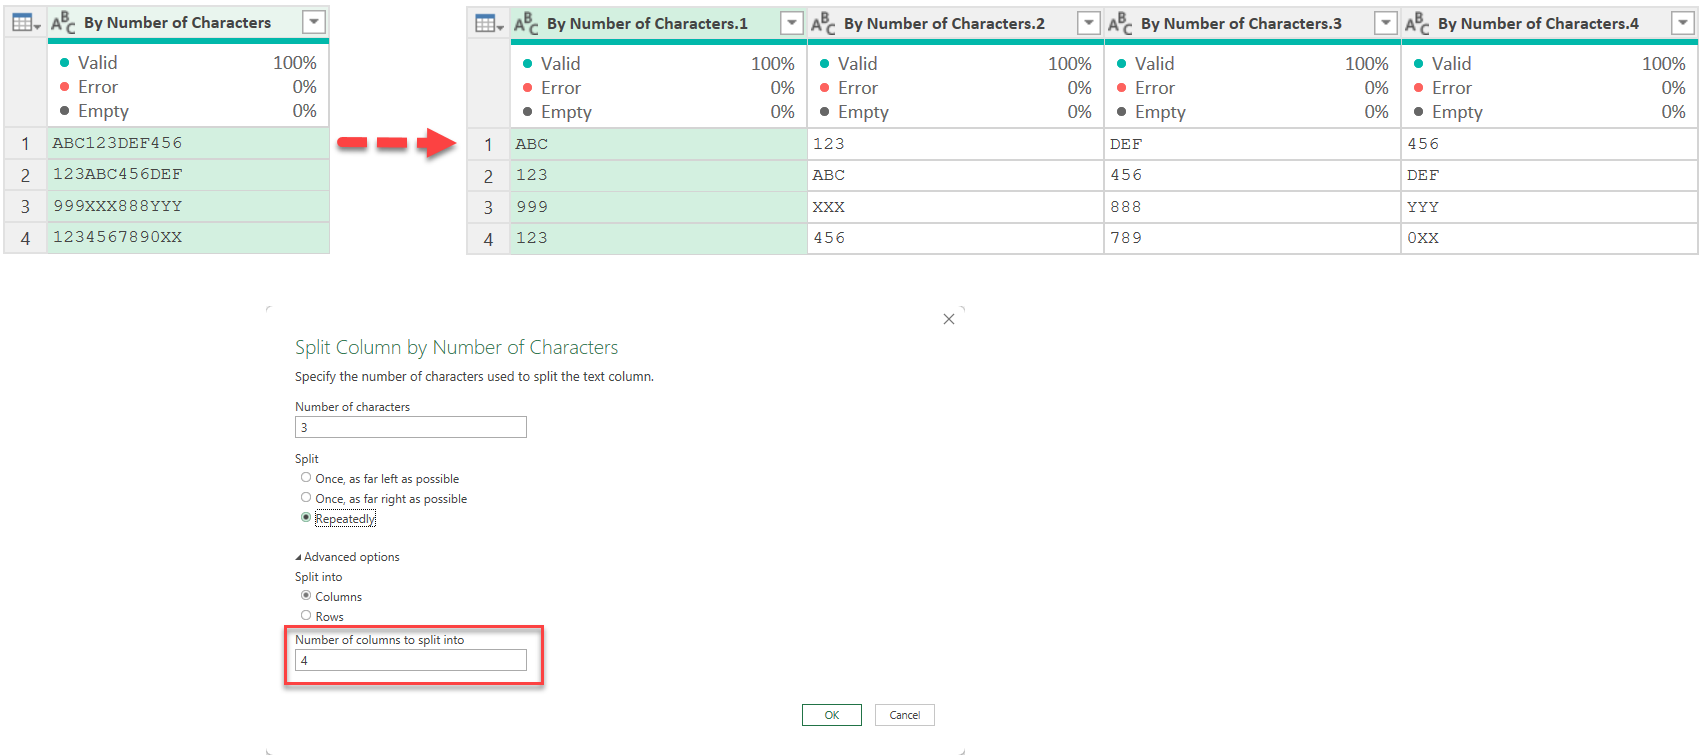
Again, a picture tells thousand words. Let’s see the result of different split options by setting the number of characters as 3.
Split Once, as far left as possible
Split Once, as far right as possible
Split Repeatedly
With this option, Power Query will input the fourth parameters – Number of columns to split into, for us. It assumes (based on the sample data loaded into it) that you want to split all the way till the end. In our example below, the max length of text is 12. To split it by 3 characters, we will have 4 columns as a result.
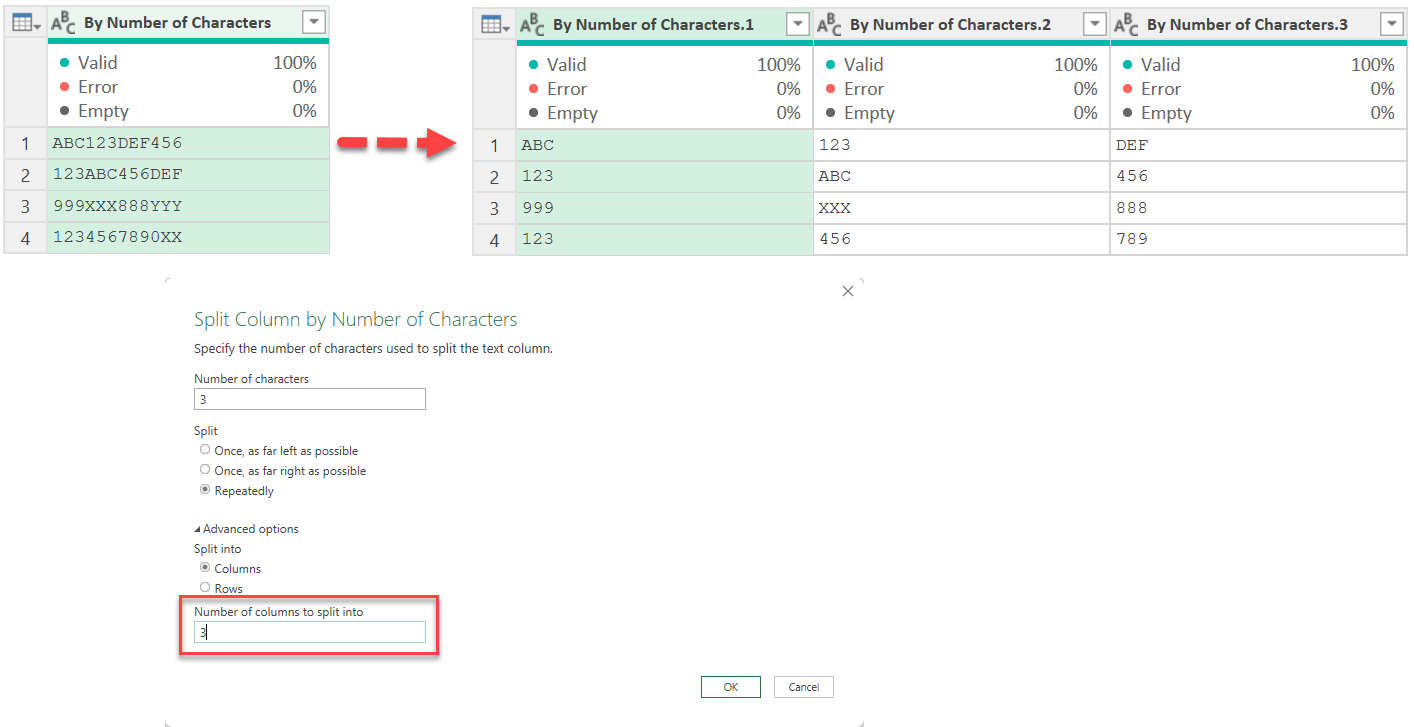
If we just want the first three columns (or put in this way the first 9 characters) only, then we can input 3 under “Number of columns to split into”. As a result, all characters beyond the limit set will be ignored.
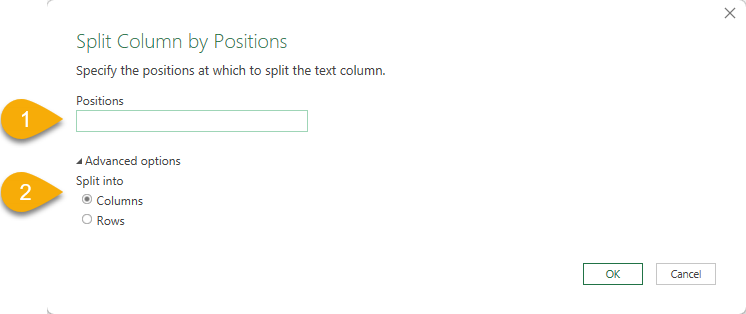
By Positions
It expects two parameters.
- The positions to split (Note the plural form. That means we can input multiple positions)
- Split into columns or rows (Default as Columns)
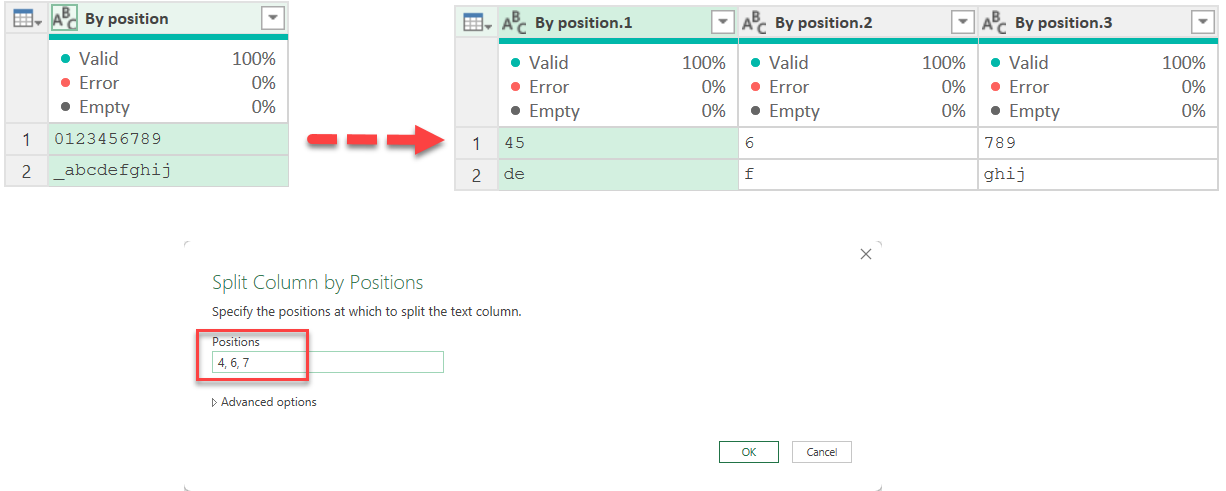
Let’s say we try to split by at positions 0, 4, 6, 7. The screenshot below visualizes what it means by position.
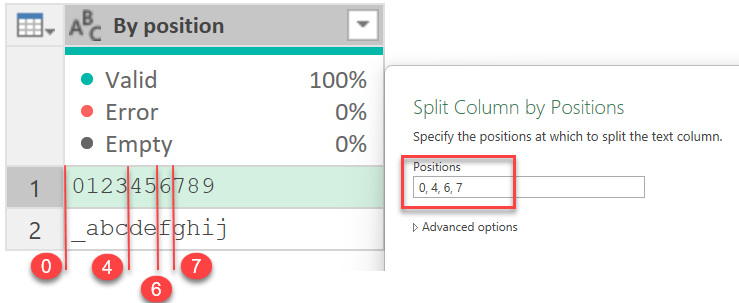
Note: Power Query is zero-based. The first position starts from zero.
As a result, we will get this:

Normally we start with position 0. If we want to ignore the first N characters, simply skip the zero.
Up to this point, if you know Excel functions well, you may be thinking… most of the above can be done with excel formula. If you have this in mind, I believe you are good in Excel. Nevertheless, try to solve the followings by formula. 😁
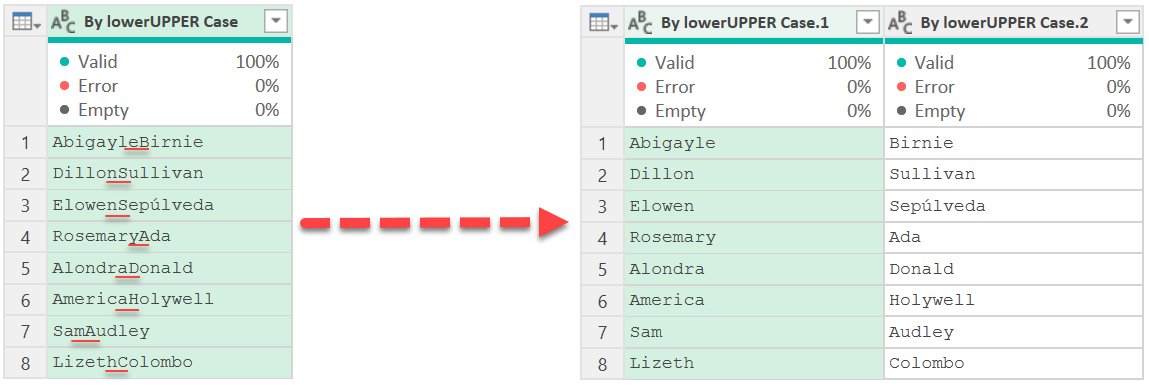
By Lowercase to Uppercase (aka CamelCase)
It is not uncommon to see CamelCase where people (probably programmer) express words without spaces. With Power Query, it is super easy to split CamelCase!
By Uppercase to Lowercase
Honestly, I haven’t met a case I need to split text with this case transition. I make up the following example by having last name in UPPERCASE while first name in lower case. The point here is to illustrate the splitting point and the result.
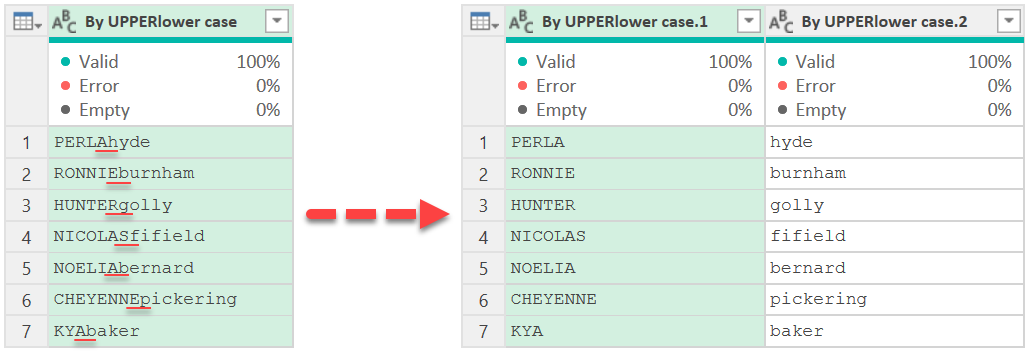
Note: For illustration purpose, the example is so simple that it yields result into two columns only. Where you have texts that MEETtheCONDITIONmultipleTimes, YouMaySeeMoreThanTwoColumns as a result. 😉
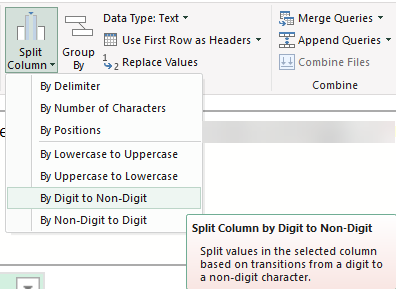
By Digit to Non-Digit
The common case that requires this option would be splitting numeric value from unit of measurement. See example below:
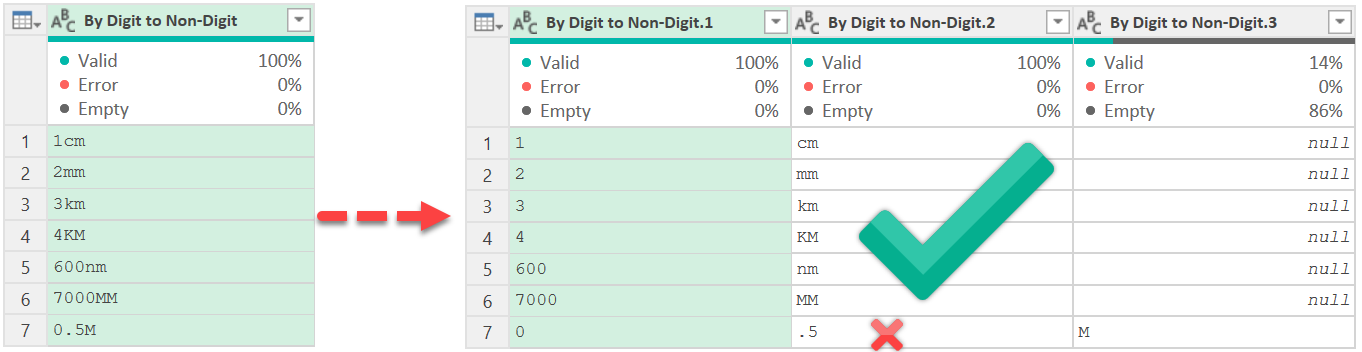
It works like a charm…. except the cases with thousand separators and/or decimal point.
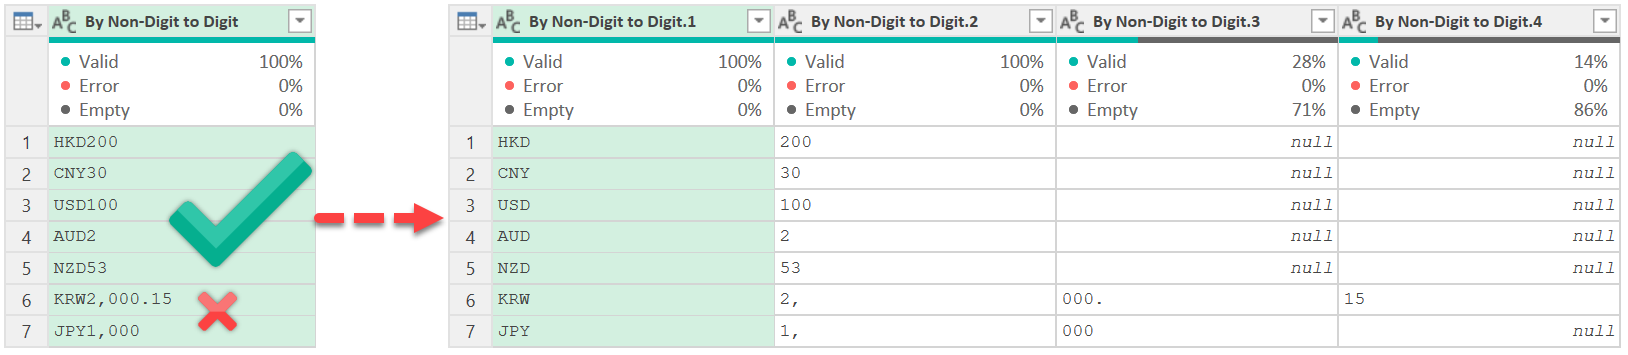
By Non-Digit to Digit
The same magic happens the other way round, with the same “limitation” when thousand separators and/or decimal point are present.
Don’t get frustrated because such limitation can be resolved by a little twist in the formula, which I have covered in the video. You may jump to 12:06 for the twist.
Let’s watch it in action!
Do you feel the Power? What do you think? Please leave your comments.
Bear in mind that when you have need data come in, a click of refresh will repeat all the transformation step. That’s the true power of Power Query.


